

Buy a complete plow system matched to your ATV’s make and model rather than piecing one together, and size the blade a few inches wider than your outside tire-to-tire stance. If you plow more than a short driveway, add a winch. Before your first pass, double-check mount torque specs against the manual and confirm the blade pivots freely.
TL;DR:
- Matching the plow blade width to your tire stance plus a few inches ensures full coverage and prevents snow trails from being left behind.
- Steel blades are ideal for heavy, packed, or wet snow, whereas poly or composite blades are better for lighter snow and protecting gravel or paved surfaces.
- Installing your plow kit requires proper torque settings, careful trimming of the skid plate, and testing the lift and pivot movement before plowing.
- A winch offers advantages for longer drives and recovery, but manual lifts are simpler and suitable for light, occasional use.
- Regular pre-use checks of bolts, pivot movement, and wear parts, along with storing the blade off-season, prolongs the setup’s efficiency and safety.
Table of Contents
- What Parts Make Up An Atv Plow Setup?
- How Do You Size And Choose The Right Blade?
- How Do You Install An Atv Snow Plow Step By Step?
- Should You Get A Winch Or Manual Lift, And What Accessories Actually Matter?
- What Maintenance Keeps A Plow Setup Running All Season?
- What Do Dealers Actually Recommend For A Plow Setup?
- An Installer’s Pre-Storm Checklist
- Get Your Plow Setup Fitted Right The First Time
- Manuals And Guides Worth Reading Before You Start
- Sources
What Parts Make Up An Atv Plow Setup?
Every plow system breaks down into four core pieces, and understanding what each one does will save you from buying the wrong kit. Manufacturer manuals for kits like the Kolpin plow mount system separate the whole assembly into a mounting plate, a push tube, and a blade, plus whatever lift mechanism you choose to run.
- Mounting plate: Bolts to your frame and skid plate. Mid-mount plates sit under the machine and stay on year round; front-mount and receiver-style plates hang off the front and come off faster for trail season.
- Push tube: The bar that connects the mount to the blade. Straight tubes are simpler and cheaper; articulating tubes let the blade tilt side to side over uneven ground.
- Blade: Steel blades hold an edge better in packed or icy snow. Poly and composite blades run lighter and slide snow more smoothly without scarring gravel or pavers.
- Lift system: A winch gives you powered up and down control and doubles as a recovery tool. A manual hand-lift lever costs less and has fewer parts to fail.
Blade shape matters too. A straight blade is standard on most ATV kits, while V-blades and angled wings show up more on UTVs and larger machines.
How Do You Size And Choose The Right Blade?
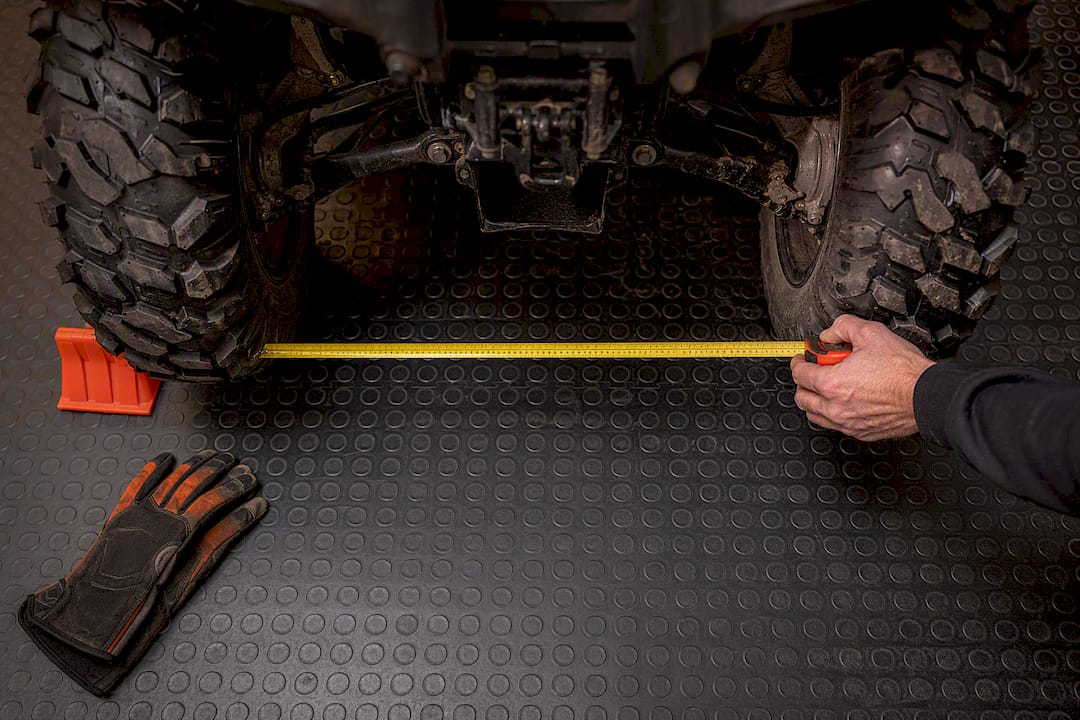
Measure your front tires from the outside edge of one tire to the outside edge of the other. That number is your minimum blade width. Most guides recommend adding a few inches beyond that so the blade fully covers your tire path instead of leaving strips of snow behind on each pass.
Blade sizing for ATVs typically falls in the 50 to 60 inch range, and there’s a real reason that window holds up across brands.
- Undersized blades force extra passes and leave windrows that get run over and packed by your own tires.
- Oversized blades overload the front end, stress the mount, and make tight turns near garage doors or gateposts clumsy.
- Steel blades work best for heavy, wet, or packed snow where you need a stiff edge that won’t flex.
- Poly and composite blades cut front-end weight and protect gravel, interlock, and painted concrete from scratching.
For a short residential driveway, a 50 inch poly blade paired with a manual lift covers most needs. Long driveways or shared lanes justify a 60 inch steel blade with power-angle control. If you’re clearing for a business or several properties, size up and budget for a winch from day one.
Pro Tip: Measure your tire stance with the ATV loaded the way you’d normally ride it, front rack accessories included. A rack-mounted winch or extra gear shifts the front weight balance enough to change how the blade handles on uneven ground.
How Do You Install An Atv Snow Plow Step By Step?
Kolpin’s own manuals put blade assembly at roughly 45 minutes and the vehicle installation itself at 15 to 30 minutes for someone working from the diagrams. Budget closer to two hours your first time through.
Tools you’ll want on the bench: a torque wrench, sockets in 13mm, 17mm, and 18mm (the sizes most manuals reference), a jack or stands to get the front end off the ground, a plastic trim tool or utility knife for skid-plate clearance, and a hair-pin or clevis pin set for the push tube.
- Position the mounting plate against the frame rails, route the U-bolts as the manual diagrams show, and hand-tighten every bolt before torquing anything.
- Trim the skid plate in small increments if your kit calls for it. Manufacturer guidance stresses cutting a little at a time and re-checking clearance rather than removing too much plastic in one pass, since you can’t easily undo an overcut.
- Torque the mounting bolts to the spec listed in your manual. Follow the sequence given rather than cranking one bolt down fully before moving to the next.
- Install the push tube, align it with the mount’s pivot point, and secure it with the clevis pin and hair pin. Articulating tubes need the pivot joint greased before you close it up.
- Attach the blade to the push tube. Tighten the pivot bolts, then back them off slightly, a detail installation guides consistently call out because a pivot bolt torqued fully tight will bind the blade and stop it from angling.
- Fit the wear bar and skid shoes, adjusting shoe height so the cutting edge rides just above the surface rather than dragging on bare pavement.
- Hook up your lift. For a winch, route the cable through the fairlead and confirm the mount for the winch itself is solid before wiring power. For a manual lift, check that the lever locks securely at multiple height positions.
- Test everything unloaded first. Raise and lower the blade through its full range, angle it side to side, and confirm the pivot moves freely before you ever push snow with it.
Should You Get A Winch Or Manual Lift, And What Accessories Actually Matter?
A winch costs more up front but earns that money back the first time you’re clearing a long driveway in the dark. It also doubles as a recovery tool if you or a buddy gets stuck, a dual-purpose value most manual setups can’t match. Manual lifts are lighter, have fewer failure points, and suit anyone clearing a short, flat driveway a few times a season.
Power-angle or hydraulic control is worth the extra cost once you’re running a long driveway, a shared lane, or plowing for neighbors on the side. Beyond the lift mechanism, a few accessories separate a decent setup from a frustrating one:
- Wear bars and skid shoes protect the blade edge and keep it riding at the right height.
- Marker flags on the blade corners help you judge width in low light or deep snow.
- Warning and beacon lighting matter more than most riders expect, since a plow blade changes your visibility profile on the road; rear-facing lights are worth adding if you’re plowing near traffic.
- Quick-release mounts let you pull the plow off in five minutes instead of thirty once the season ends.
Budget setups with a manual lift and poly blade sit at the low end of the price range. Add a winch, power-angle kit, and steel blade, and you’re looking at a premium build, but one that holds up to heavier, more frequent use.
What Maintenance Keeps A Plow Setup Running All Season?
A five-minute pre-use check saves you from breakdowns mid-storm. Run through fastener torque, pivot movement, winch operation, and skid shoe clearance before every heavy snowfall.
- Check all mount bolts and pivot fasteners for torque before the season’s first big storm.
- Angle the blade slightly rather than pushing straight on, so you’re not driving directly over the snow you just piled.
- Keep travel speed moderate. Faster isn’t better once the blade starts throwing snow instead of pushing it.
- Lubricate pivot points and inspect the cutting edge and wear bars monthly through the season.
- Store the blade off the ground in the off-season, and pull the mount entirely if you’re switching back to trail riding.
Pro Tip: Check your ATV’s front-axle load rating before you commit to a steel blade and winch combo. A machine near its front-end weight limit handles worse in deep snow and wears front-end components faster. If you’re unsure how your tire choice affects that load balance, it’s worth a look at how tire selection factors into overall front-end capability, and how you store the machine once plow season wraps up.
What Do Dealers Actually Recommend For A Plow Setup?
Dirty Birdy Powersports has handled over 200 deliveries with a 5.0 Google rating, and that hands-on volume shapes three consistent recommendations: match the kit to your specific model rather than mixing brands, size the blade to your tire stance rather than guessing, and choose a winch if you plow more than one property. Visit the Dirty Birdy Powersports dealership page for model-specific fitment help.
An Installer’s Pre-Storm Checklist
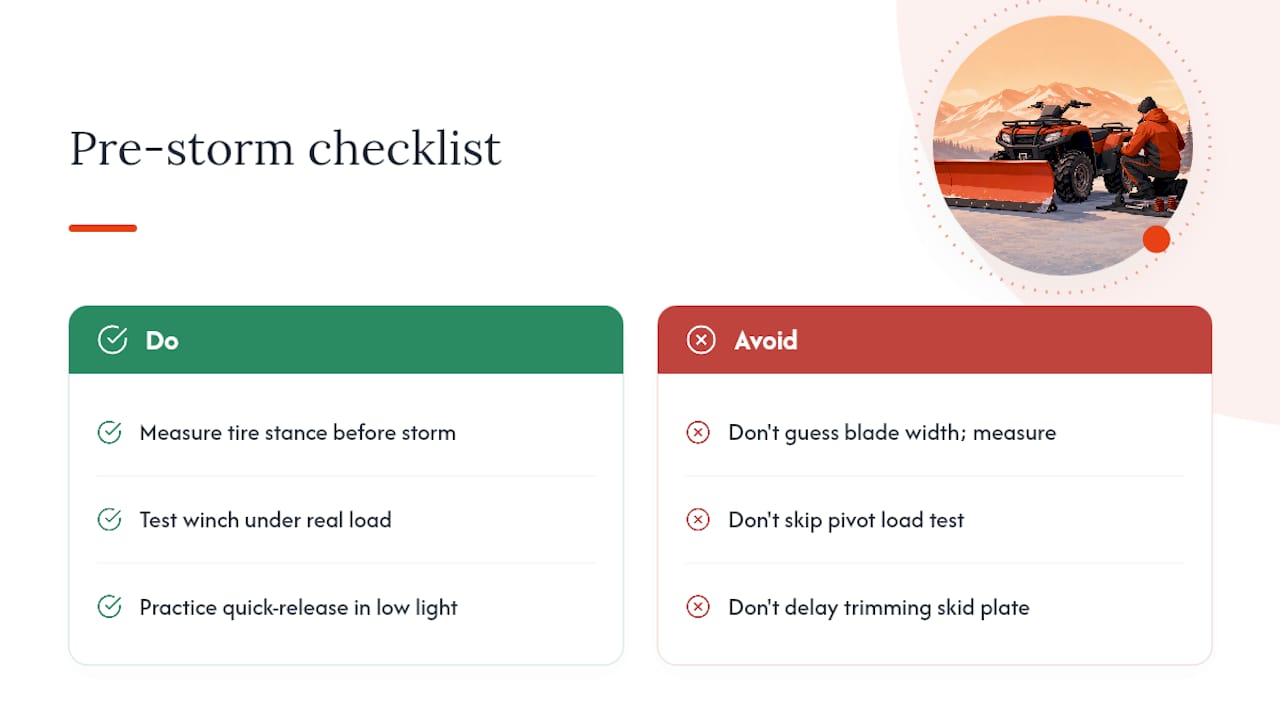
Before the first real storm, I measure the tire stance again even on a machine I’ve plowed with before, test the winch under a real load instead of just running it empty, and practice the quick-release a couple of times so it’s second nature at 6 a.m. in the dark.
The mistakes I see most: guessing on blade width instead of measuring, skipping a load test on the pivot before the season starts, and forgetting to trim the skid plate until the mount is already half bolted on.
— Dirty
Get Your Plow Setup Fitted Right The First Time
Dirty Birdy Powersports checks fitment against your exact ATV model before you buy a single bolt, which is the step most online plow kits skip entirely. We handle OEM and aftermarket parts, verify mount compatibility for your machine, and can walk you through installation or book it in for you.
If your front tires are already showing uneven wear from pushing extra weight all winter, that’s worth addressing before plow season, not after. Take a look at the Braven Hellhound Uber XOR ATV/UTV radials for a tire built to handle the added front-end load a plow puts on your machine. Measure your tire stance, call for a fitment check, or book your installation with us before the first storm hits.
Manuals And Guides Worth Reading Before You Start
A few sources cover the technical details this article only summarizes:
- The Kolpin/Polaris installation manual supplies exact torque specs, tool lists, and skid-plate trimming diagrams.
- The Kolpin plow comparison chart confirms blade width ranges by vehicle class.
- HitchDoc’s buying guide walks through the five core decisions: size, mount, shape, lift, and complete kit versus built-from-parts.
Sources
- ATV PLOW MOUNT (Kolpin / Polaris installation manual)
- How to Choose the Right ATV or UTV Snow Plow | HitchDoc
- Atv
- How to Install an ATV Snow Plow