

Store your ATV upright in a dry, ventilated space after completing a short but non-negotiable checklist: clean the machine, stabilize or drain the fuel, change the oil, protect the battery, relieve tire and suspension load, and cover or enclose it. That sequence, done in order, is what separates a machine that fires up in April from one that needs a shop visit before it ever sees a trail again.
Three things to do today:
- Top off the tank and run a fuel stabilizer through the system (or drain completely if storing for an extended period)
- Remove the battery or connect a smart battery maintainer
- Jack the machine onto stands or elevate it so the tires clear the ground
Safety verdict: Always store your ATV upright on level ground. Never on its side, never tilted vertically.
Pro Tip: Pull out your owner’s manual before you start. CFMOTO and other manufacturers publish model-specific fluid specs and torque values that generic guides can’t cover. Manufacturer guidance is always the tiebreaker.
Key Takeaways
Proper ATV winter storage requires cleaning, a deliberate fuel decision, fresh oil, battery protection, tire load relief, pest-proofing, and the right storage environment — done in order before the first hard freeze.
| Point | Details |
|---|---|
| Fuel decision is critical | Use stabilizer for storage under 90 days; drain the system completely for longer periods. |
| Change oil before storage | Old oil turns acidic over winter and corrodes internal engine surfaces; fresh oil protects. |
| Battery needs active care | Remove and store indoors, or keep on a smart maintainer; check monthly regardless. |
| Elevate tires off the ground | Jack stands at manufacturer lift points prevent flat-spotting and relieve suspension strain. |
| Dirtybirdypowersports | Stocks radial tires, security accessories, and offers dealer prep for CFMOTO owners across Canada. |
Table of Contents
- What does proper ATV winter storage actually involve?
- How should you handle the battery over winter?
- Why do tires flat-spot, and how do you prevent it?
- Where should you store your ATV for winter?
- How do you lubricate and protect against corrosion before storage?
- What tools and products do you need for winter storage?
- What problems show up after long storage, and how do you fix them?
- What’s the right spring startup sequence?
- Why you should never store an ATV on its side
- Why professional winter prep is worth considering
- Dirtybirdypowersports has the parts and expertise to get you ready
- Sources
What does proper ATV winter storage actually involve?
Proper ATV winter storage covers a lot more ground than parking the machine and throwing a tarp over it. The full process includes cleaning, changing fluids, making a fuel decision, protecting the battery, relieving tire load, blocking pests out, and choosing the right environment. Done right, it protects your investment through months of freezing temperatures and gets you back on the trails without a single repair bill.
Step 1: Clean the machine thoroughly
Start with a full wash, including the undercarriage and radiator fins. Mud, debris, and road salt left on the frame will corrode metal over a long winter. If you use a pressure washer, keep the nozzle away from electrical connectors, bearings, and air intakes. After washing, dry the machine completely — trapped moisture under panels or in crevices is where rust starts. A dust mask is worth wearing when blowing out tight spaces with compressed air.
Step 2: Make your fuel decision
Two valid approaches exist, and the right one depends on how long you’re storing:
- Fill the tank and add stabilizer. Pour in a quality fuel stabilizer (follow the product’s ratio), top the tank to minimize air space, then run the engine for 10 minutes so the treated fuel circulates through the carb or injectors. This works well for shorter-term storage.
- Drain the fuel system completely. For longer storage periods, draining is cleaner. Run the engine until it stalls, then drain the carb bowl if applicable. An empty system can’t varnish.
Never leave untreated fuel sitting in the tank. Ethanol-blended gasoline, which is standard across Canada, begins to degrade and separate in as little as 30 days.
Step 3: Change the oil and filter
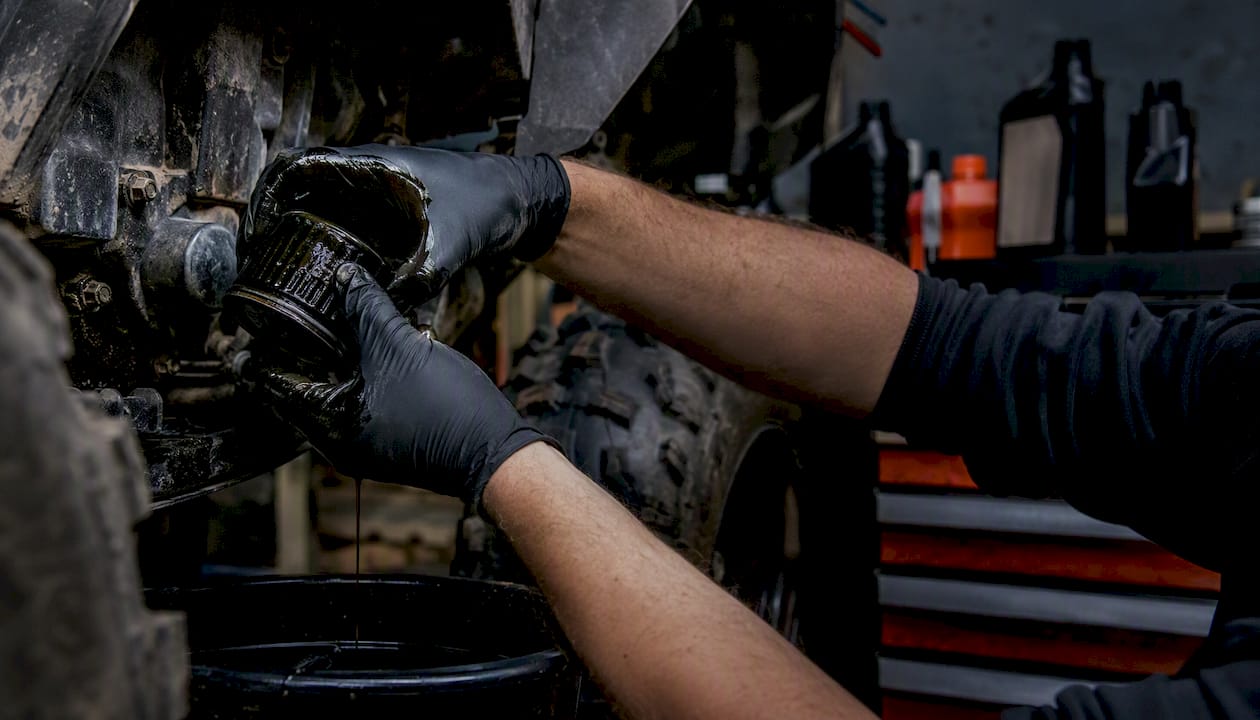
Old oil contains combustion byproducts that turn acidic over time and attack internal engine surfaces. Change the oil and filter before storage, not in spring. Fresh oil means the engine sits in a protective bath all winter rather than a corrosive one. Check your owner’s manual for the correct viscosity grade for cold-climate storage.
Step 4: Service the air filter and block intakes
Clean or replace the air filter. A clogged filter going into storage will be worse coming out. Once the filter is serviced, block the airbox inlet and the exhaust outlet with a clean rag or purpose-made foam plugs. This is your first line of defense against rodents nesting inside the intake tract.
Rodents can chew through wiring harnesses and nest inside airboxes during a single winter. Blocking every opening — intake, exhaust, and any body panel gaps — is not optional in Canadian storage conditions. The CFMOTO blog specifically calls out rodent-proofing as a core storage step: clean the machine, apply rust prevention, elevate it, protect from rodents, and use a quality cover.
Step 5: Fog the spark plugs (optional but smart)
Remove the spark plugs and spray a small amount of fogging oil directly into each cylinder. Crank the engine briefly to distribute the oil, then reinstall the plugs. This coats cylinder walls and prevents rust during long storage. It’s especially worth doing if you’re storing past 90 days or in a humid environment.
Step 6: Check coolant and antifreeze
Check the coolant reservoir and radiator for the correct antifreeze concentration. In Canada, where temperatures regularly drop below -30°C in many provinces, a 50/50 mix of antifreeze and distilled water protects to around -37°C. If you’re unsure of the current concentration, use an inexpensive antifreeze tester. Never drain the cooling system entirely unless the manufacturer’s service manual specifically calls for it.
Safety note: Coolant systems are pressurized when hot. Let the engine cool completely before opening the radiator cap or reservoir.
How should you handle the battery over winter?
Battery failure is the most common complaint after winter storage, and it’s almost entirely preventable.
Remove vs. keep on the vehicle:
- Remove the battery if you’re storing the machine for more than 60 days, if the storage space is unheated, or if you don’t have easy access to a power outlet near the machine. Store it indoors in a cool, dry location. Concrete floors conduct cold and can accelerate self-discharge, so set the battery on a piece of wood or a rubber mat.
- Keep it on the vehicle only if you can connect a smart battery maintainer directly to it. A maintainer (not a basic trickle charger) monitors voltage and cycles on and off to keep the battery at full charge without overcharging.
Monthly checks matter. Even a battery on a maintainer should be visually inspected once a month. Look for swelling, corrosion on terminals, or any sign of electrolyte leakage.
Lithium vs. lead-acid: If your machine runs a lithium iron phosphate (LiFePO4) battery, confirm that your maintainer is lithium-compatible. A lead-acid charger can damage a lithium cell. Most modern smart chargers list compatibility on the label.
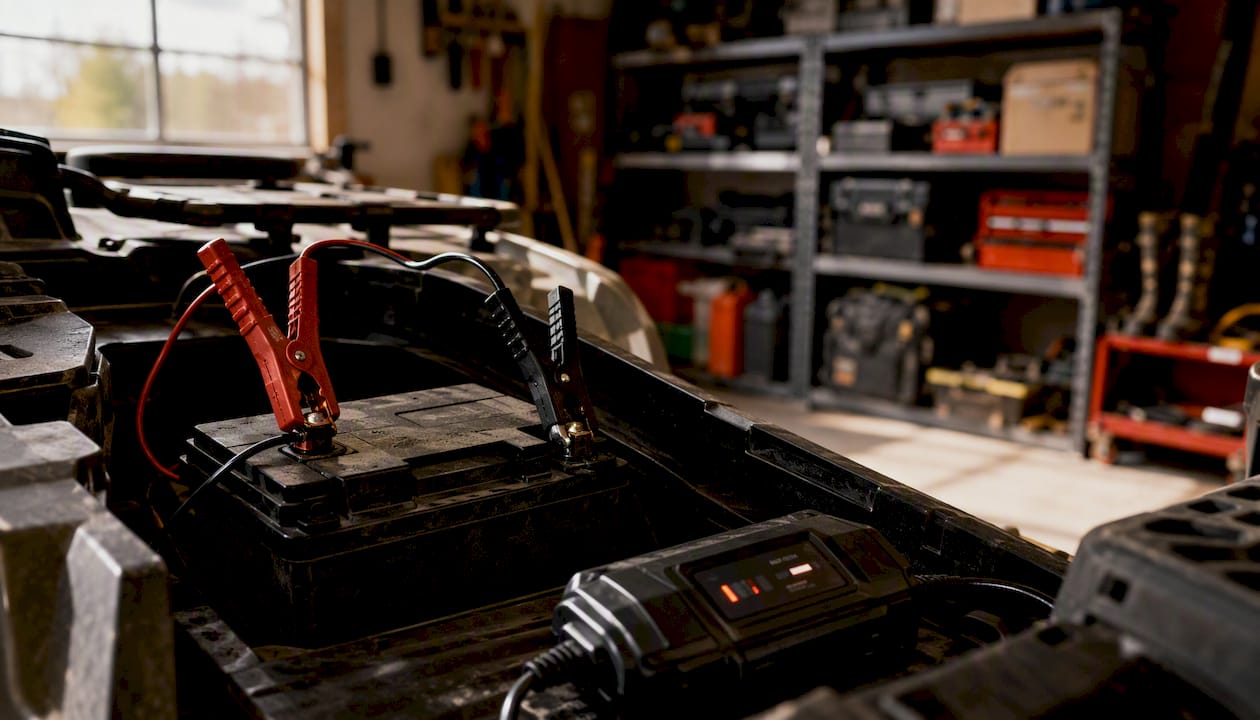
Pro Tip: Before reinstalling the battery in spring, clean the terminals with a wire brush and apply a thin coat of dielectric grease. Corroded terminals are a surprisingly common cause of no-start conditions after storage.
Why do tires flat-spot, and how do you prevent it?
Flat-spotting happens when a tire sits under load in one position long enough for the contact patch to develop a slight deformation. Bias-ply tires are more vulnerable than radials because their construction is less rigid, but any tire left stationary under weight for months can develop at least a temporary flat spot.
Your options, in order of effectiveness:
- Elevate the machine on jack stands. Getting the tires completely off the ground is the best solution. Experts recommend using jack stands or sturdy blocks placed at the manufacturer’s designated lift points. Never use unstable improvised supports or place stands on soft or uneven ground.
- Inflate tires to the upper end of the recommended range. If elevating isn’t possible, adding a few PSI above the standard riding pressure reduces the size of the contact patch and slows flat-spotting.
- Move the machine periodically. Rolling it forward or backward a few inches every few weeks rotates the contact patch. It’s the least effective option, but it’s better than nothing.
If you’re shopping for replacement tires before storage, radial constructions like the Braven Bloodaxe R/T Hybrid or Braven Hellhound Uber XOR hold their shape better over long storage periods than bias-ply alternatives.
Pro Tip: When placing stands, check your owner’s manual for the correct jack points. Lifting from the wrong location can damage the frame, skid plates, or suspension components.
Where should you store your ATV for winter?
Indoor storage is the clear winner. A heated or insulated garage keeps temperature swings manageable, eliminates direct exposure to snow and ice, and dramatically reduces corrosion risk. An unheated shed is still better than outside, because it blocks precipitation and wind-driven moisture.
| Factor | Indoor (garage/shed) | Outdoor (covered) |
|---|---|---|
| Temperature stability | High | Low |
| Corrosion risk | Low | High |
| Pest exposure | Moderate | High |
| Security | High | Low |
| Cost | Usually free | Cover cost only |
If outdoor storage is your only option:
- Use a breathable, weatherproof cover. A non-breathable tarp traps condensation underneath and accelerates rust.
- Elevate the machine off wet ground using boards or a platform. Direct ground contact wicks moisture.
- Secure the cover against wind with straps or bungee cords.
- Add a cam-lock or secondary security device. An ATV cam lock adds a meaningful deterrent for machines stored in exposed locations.
- Place rodent deterrents (peppermint sachets, ultrasonic repellers, or snap traps) around the perimeter.
Humidity control for enclosed spaces: In a sealed garage or storage unit, humidity can build up and cause corrosion even without direct moisture exposure.
How do you lubricate and protect against corrosion before storage?
Lubrication before storage is about protecting parts that will sit motionless for months, not about preparing them for immediate use. Static metal-on-metal contact without a lubricant film corrodes faster than moving contact.
Grease points to hit:
- All suspension pivot points and A-arm bushings
- Zerk fittings on ball joints and tie rod ends (use a grease gun with the correct grease for your climate)
- Steering stem bearings
- Wheel bearing hubs if accessible
Chain and cable care:
- Clean the drive chain with a chain cleaner, then apply a quality chain lubricant rated for cold temperatures
- Lubricate throttle, brake, and clutch cables with cable lube or a light penetrating oil. Cables that seize over winter are a common and avoidable spring problem.
Corrosion protection:
- Spray bare metal surfaces (frame rails, exhaust headers, exposed hardware) with a rust inhibitor like ACF-50 or Boeshield T-9, both of which are available through Canadian retailers
- Clean electrical connectors with contact cleaner, dry them, and apply dielectric grease before reconnecting. Moisture in a connector over winter causes oxidation that leads to intermittent electrical faults in spring.
Pro Tip: After greasing zerk fittings, wipe away the excess grease that purges out. Old grease pushed out of a fitting carries contaminants, and leaving it on the fitting attracts dirt.
Sealing openings: Beyond the airbox and exhaust, check for any body panel gaps or frame openings that a mouse could squeeze through. Steel wool stuffed into gaps is a cheap and effective deterrent because rodents won’t chew through it.
What tools and products do you need for winter storage?
Assembling a storage kit before you start saves multiple trips and keeps the job from stalling halfway through.
Essential tools:
- Floor jack and quality jack stands (rated for your machine’s weight)
- Torque wrench (for drain plugs and spark plugs)
- Grease gun with the correct grease cartridge
- Battery maintainer (smart, multi-stage)
- Fuel siphon or drain pump
- Shop rags and microfiber towels
- Basic socket set and screwdrivers
Consumables and products:
- Fuel stabilizer (STA-BIL or equivalent, available at Canadian Tire, NAPA, and most farm supply stores)
- Fogging oil for cylinder protection
- Engine oil and filter (correct spec for your model)
- Antifreeze tester and coolant if needed
- Rust inhibitor spray (ACF-50 is a Canadian favorite among powersports riders)
- Chain cleaner and chain lube
- Cable lubricant
- Dielectric grease
- Breathable ATV cover
- Desiccant packs or a small dehumidifier for enclosed storage
- Rodent deterrents (peppermint sachets, snap traps, or ultrasonic repellers)
Buying tips for Canada: Prioritize quality on jack stands and the battery maintainer. Cheap stands are a safety risk, and an underpowered charger that overcharges a battery costs more in replacement batteries than the price difference. For covers and desiccants, local availability at Canadian Tire or Princess Auto is usually faster than online shipping, especially heading into fall. For tires and powersports-specific accessories, Dirtybirdypowersports ships across Canada with no markup.
For off-road lighting considerations during storage prep or spring upgrades, the off-road lighting buyer’s guide from Ozkonic Kustomz covers load and battery draw factors worth knowing before adding accessories.
What problems show up after long storage, and how do you fix them?
Most post-storage problems trace back to one of four causes: stale fuel, a dead or damaged battery, seized brakes, or rodent damage.
Fuel varnish and clogged injectors/carburetors:
- Drain the old fuel completely if stabilizer wasn’t used.
- Add fresh fuel and a bottle of fuel system cleaner (Sea Foam or equivalent).
- Run the engine and let the cleaner cycle through.
- If the engine still runs rough or won’t idle, a carb cleaning or injector service is needed. At that point, a shop visit is the right call.
Dead battery:
- Connect a smart charger and allow a full charge cycle (typically 8–24 hours depending on depth of discharge).
- If the battery won’t hold a charge after a full cycle, it’s sulfated and needs replacement.
- Check voltage with a multimeter: a healthy 12V lead-acid battery reads 12.6V or higher at rest.
Seized brakes:
- Seized calipers are common after long storage, especially if the machine sat with wet brake components.
- Apply the brakes firmly a few times before riding. If a caliper remains stuck, don’t ride. Have a technician inspect and rebuild or replace the caliper.
Rodent damage:
- Inspect the wiring harness starting at the battery, then trace toward the engine and ECU.
- Look for chewed insulation, nesting material, and droppings near the airbox and under the seat.
- Damaged wiring requires proper splicing with heat-shrink connectors, not tape. If the damage is near the ECU or fuel injection harness, stop and take it to a shop.
When to call a shop: Coolant leaks, transmission noise, brake system failures, and any damage to the fuel injection harness are not DIY territory. A dealer inspection costs less than a compounded repair.
What’s the right spring startup sequence?
Getting the first start right after winter storage takes about 30 minutes and prevents the most common spring failures.
- Visual inspection first. Before connecting anything electrical, walk around the machine and look for rodent signs, fluid leaks under the machine, cracked hoses, and loose fasteners. Check that all intake and exhaust plugs have been removed.
- Reinstall or reconnect the battery. If the battery was stored separately, check its resting voltage before installing. Below 12.0V on a lead-acid battery means it needs a full charge before the first start attempt.
- Check all fluid levels. Engine oil, coolant, brake fluid, and differential fluid. Top off anything that’s low and look for the source if a level has dropped significantly.
- Fuel up. If you used stabilizer, the treated fuel is fine for the first start. If you drained the system, add fresh fuel now.
- Check tire pressure. Inflate to the manufacturer’s recommended PSI before moving the machine off stands.
- Start the engine and observe. Let it warm up at idle. Watch for smoke (blue means oil burning, white means coolant), rough idle, or any fuel smell. A brief rough idle on the first start is normal as fuel circulates; it should smooth out within 60 seconds.
- Brake test before riding. Apply front and rear brakes firmly while stationary. Both should feel firm and release cleanly.
- Short low-speed test ride. Stay close to home for the first 10 minutes. Listen for unusual noises and check that the steering, throttle, and brakes all respond normally.
Pro Tip: Carry a fire extinguisher mount on your machine during the first spring ride. A fuel system that sat all winter has a slightly higher chance of a leak on the first heat cycle.
Why you should never store an ATV on its side
This is the one storage mistake that can total an engine before you even start it.
Never store an ATV on its side or in a vertical orientation unless the manufacturer explicitly states the machine is designed for it. Fluids — engine oil, coolant, battery acid — migrate when the machine is tilted. Oil can enter the air intake tract or flood cylinders. Battery acid can leak onto wiring. When you start the engine after storage in a compromised orientation, you risk hydrolocking the engine or causing immediate internal damage. ATV.com’s preparation guide is direct on this point: fluid migration into the air intake or cylinders causes severe damage on startup.
The same logic applies to elevation. Lifting the machine on jack stands doesn’t just protect tires — it keeps the machine level and stable for the entire storage period, which matters for fluid distribution in the engine and transmission.
Pro Tip: If you’re tight on garage space and tempted to tilt the machine to fit it in, rent a storage unit instead. A month of storage fees is a fraction of the cost of an engine rebuild.
Dirtybirdypowersports offers professional winter prep for CFMOTO owners who want a technician to handle the full process. A dealer prep covers fluid changes, battery service, pest-proofing, and a documented inspection — worth considering if you’re short on time or want the work on record for warranty purposes.
Why professional winter prep is worth considering
At Dirtybirdypowersports, we work on CFMOTO machines every day. That hands-on familiarity with how these engines, cooling systems, and electrical harnesses behave over a Canadian winter gives us a perspective that a generic checklist can’t fully replicate.
The honest case for professional prep isn’t that owners can’t do it themselves — most can, and this guide gives you everything you need. The case is that a dealer inspection catches things a first-time or occasional winterizer will miss: a coolant hose that’s soft and about to fail, a brake caliper that’s borderline, a battery that tests fine on voltage but fails a load test. Those are the problems that show up as breakdowns on the first spring ride.
A dealer winter prep at Dirtybirdypowersports covers the full checklist: fluid changes, battery service, pest-proofing, corrosion treatment, and a documented inspection. For owners under CFMOTO’s warranty, having service records from an authorized dealer also protects your coverage. We serve customers across Canada, and for owners outside Squamish, we’re happy to walk through a remote consultation or help you source the right parts for a DIY prep.
Dirtybirdypowersports has the parts and expertise to get you ready
When it comes to ATV winter storage, having the right products on hand before you start is half the battle. Dirtybirdypowersports stocks a range of accessories and protective gear that Canadian ATV and UTV owners actually need for winter prep, not just generic aftermarket filler.

For tire protection during storage, the Braven Hellhound Uber XOR radials and Braven Bloodaxe R/T Hybrid are radial constructions that resist flat-spotting better than bias-ply tires over long storage. Security accessories like the ATV-UTV TEK cam lock add a real deterrent for machines stored in exposed locations. Browse the full inventory or reach out to the team at Dirtybirdypowersports to get a personalized parts list for your specific machine. Nationwide delivery across Canada means you’re not limited to what’s on a local shelf.
Sources
The following sources informed this guide and are worth bookmarking for model-specific details and further reading:
Recommended
- ATV-UTV TEK Can-Am X3 / Northstar - Clearview / Elite Sideview Mirror – Dirty Birdy Powersports
- ATV-UTV TEK Elite Series ATV Cam Lock – Dirty Birdy Powersports
- ATV-UTV TEK Clearview UTV Center Mirror – Dirty Birdy Powersports
- ATV-UTV TEK Wedgelock FlexGrip Pro - Double - Polaris ATV/UTV Lock & R – Dirty Birdy Powersports