

Getting motorcycle gear sizing wrong isn’t just uncomfortable — it can get you hurt. Armor that floats off your elbow during a slide, a helmet that rocks on your head, or gloves so tight you can’t feel the brake lever all fail at the one job they’re supposed to do. The fix is straightforward: take eight measurements before you buy anything.
Here’s what you need for each item:
- Helmet: Head circumference (1 inch / 2.5 cm above your eyebrows). Rule: snug and stable, no rocking.
- Jacket: Chest at the fullest point under your arms + torso length from collar to waist. Rule: armor must stay on the joint in a riding position.
- Gloves: Palm circumference (excluding thumb). Rule: no bunched material at fingertips; controls must feel precise.
- Pants: Natural waist + inseam (crotch to ankle bone). Rule: size to waist first, tailor the inseam.
- Boots: Foot length (heel to longest toe) + width, measured with riding socks on. Rule: heel locks, toes don’t cramp.
When you’re between sizes: size down for helmets (padding compresses), size to chest for jackets, size up for gloves if you wear liners, size to waist for pants, and size to foot length for boots. Dirtybirdypowersports carries OEM and aftermarket apparel with in-person fitting support in Squamish, BC, and ships nationwide — a useful fallback when online charts leave you guessing.
Key Takeaways
Getting motorcycle gear sizing right comes down to taking eight precise measurements, matching them to brand-specific charts, and running physical fit tests before you ride in anything.
| Point | Details |
|---|---|
| Measure eight body points | Head, chest, waist, hips, inseam, sleeve, palm, and foot length are the required measurements for all gear types. |
| Helmet: size down between sizes | Liner padding compresses 15–20% during break-in; a snug helmet becomes comfortable, a loose one stays unsafe. |
| Jacket: prioritize chest and armor fit | Armor must stay on the joint in riding posture; test by sitting forward with arms extended before buying. |
| Brand charts are starting points only | Shoei, Arai, Bell, HJC, Alpinestars, REV’IT!, and others use different standards; always cross-check gender-specific charts. |
| Dirtybirdypowersports ships nationwide | In-person fitting in Squamish, BC, and Canada-wide delivery with exchange support reduce online sizing risk. |
Table of Contents
- How do you measure yourself for motorcycle gear?
- Helmet sizing: how to measure, identify your head shape, and run fit tests
- How should a motorcycle jacket or suit fit for real protection?
- How do you size motorcycle gloves correctly?
- How to size motorcycle pants and one-piece suits
- Boot sizing: length, width, and the sock thickness test
- Brand sizing charts and conversions for Canadian riders
- What should you do when you fall between sizes?
- How to try gear at home and handle returns in Canada
- Expert tips for Canadian riders on fit, seasons, and maintenance
- How gear care and maintenance affect fit over time
- A straight take on gear fit from Dirty Birdy Powersports
- Dirtybirdypowersports fits you right, ships anywhere in Canada
- Sources
How do you measure yourself for motorcycle gear?
Accurate numbers are everything. A tape measure off by half an inch can put you in the wrong size across multiple brands. Use a soft fabric tape, stand relaxed (not at attention), and have someone help where you can’t see the tape clearly.
Measurement checklist
Take every measurement twice and use the larger number. Discrepancies of more than half an inch usually mean the tape slipped or you tensed up.
- Head: Wrap the tape around your skull about 1 inch above your eyebrows and level across the back. Don’t compress the tape. Write down both measurements and use the larger one.
- Chest: Keep your arms slightly away from your body. The tape goes under your armpits at the fullest point of your chest. Breathe normally — don’t expand your chest to inflate the number.
- Waist and hips: Waist is at the narrowest point, usually just above your navel. Hips go around the widest point of your pelvis.
- Inseam: Stand with feet shoulder-width apart. Measure from the crotch seam to the ankle bone. If you’re measuring alone, mark the floor and measure from there.
- Sleeve and torso: For sleeve length, start at the center back of your neck, go over the shoulder point, then down to your wrist with your arm slightly bent. Torso length runs from the base of your neck (C7 vertebra) to your natural waist.
- Palm circumference: Wrap the tape around the widest part of your palm, just below the knuckles, with your thumb held out. This is your glove size number.
- Foot: Stand on a piece of paper, trace your foot, and measure from heel to the tip of your longest toe. Do both feet and use the larger measurement.
Pro Tip: Simulate your riding position while someone checks sleeve length and torso length. Lean slightly forward with your arms extended as if on the bars. Jacket sleeves that measure correctly standing up can still expose your wrists by an inch or more in a real riding posture — and that gap leaves your forearms unprotected.
Helmet sizing: how to measure, identify your head shape, and run fit tests
Your helmet is the single piece of gear where a wrong size has the most immediate safety consequence. Measure head circumference about 1 inch (2.5 cm) above the eyebrows and use the larger of two measurements. Then match that number to the brand’s chart — but don’t stop there.
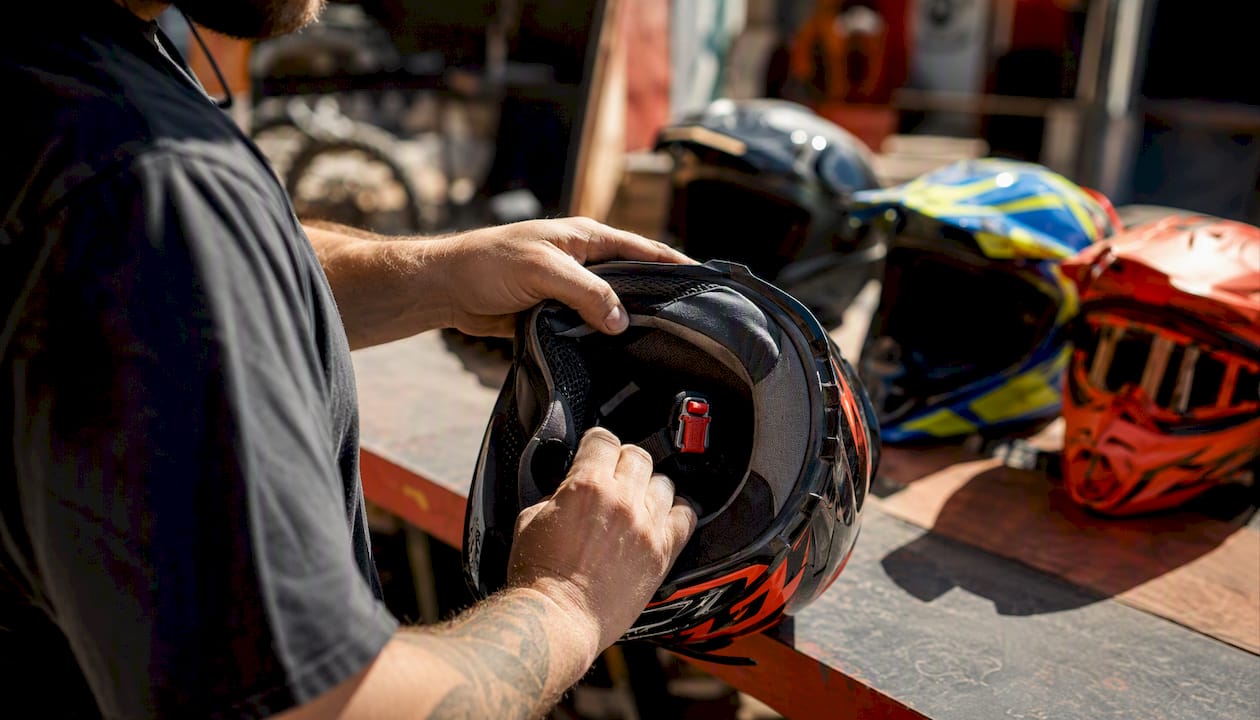
Head shape matters as much as circumference
Three head-shape categories exist: intermediate oval (most common, slightly longer front-to-back than side-to-side), long oval (noticeably elongated front-to-back), and round oval (nearly equal in all directions). The same circumference in two different head shapes can make one helmet feel perfect and another feel like a vise on your temples.
Brand tendencies vary. Shoei and Arai have historically catered to intermediate and long oval shapes, which suits many North American and European riders. Bell and HJC tend to fit rounder oval heads more comfortably. Scorpion sits closer to intermediate oval. Icon helmets generally fit intermediate oval shapes. These are tendencies, not guarantees — a helmet size calculator and head-shape guide can help narrow your options, but they’re a starting point, not a substitute for trying the helmet on.
Fit tests to run before you commit
- Finger test: With the helmet on, try to slide a finger between the helmet’s forehead pad and your forehead. You should feel resistance. If a finger slides in easily, the helmet is too large.
- Movement / shake test: Grip the helmet and try to rotate it side-to-side and front-to-back. It should move your head with it, not slide independently on your skull.
- Eye-port alignment: The top of the visor opening should sit just above your eyebrows. If you’re looking through the lower half of the port, the helmet is sitting too low — likely a size or shape issue.
- Cheek-pad pressure: Cheek pads should press firmly against your cheeks without causing pain. Expect some initial pressure; it will ease as the liner beds in.
ECE 22.06-certified helmets often have thicker padding than older standards, so they can feel noticeably tighter out of the box. That’s not a sign you’ve grabbed the wrong size — it’s a sign the helmet meets a stricter safety spec. Helmet liners typically compress noticeably during break-in, so a helmet that feels firm but stable after 10–20 hours of use is doing exactly what it should.
ECE 22.06 note: If you’re new to current-standard helmets, re-check fit after your first 15–20 hours of riding. What felt borderline tight on day one often settles into a precise, secure fit.
Between sizes for helmets: Size down in most cases. Padding compresses; a loose helmet doesn’t get tighter. The exception is when the smaller size creates painful pressure points — in that case, check whether the manufacturer offers aftermarket cheek-pad sets in different thicknesses. Many Shoei, Arai, and Bell models do, letting you fine-tune fit without swapping shells.
Dos and don’ts:
- Do: try on with the balaclava or liner you plan to wear
- Do: wear the helmet for at least 10 minutes before deciding
- Don’t: buy a helmet that rocks on your head, even slightly
- Don’t: assume DOT and ECE helmets of the same labeled size will fit identically — liner thickness varies by certification standard
How should a motorcycle jacket or suit fit for real protection?
A jacket that fits well in a store can still fail you on the bike. Motorcycle apparel must be snug enough to keep armor aligned during impact yet allow riding motion — and those two requirements pull in opposite directions if you size wrong.
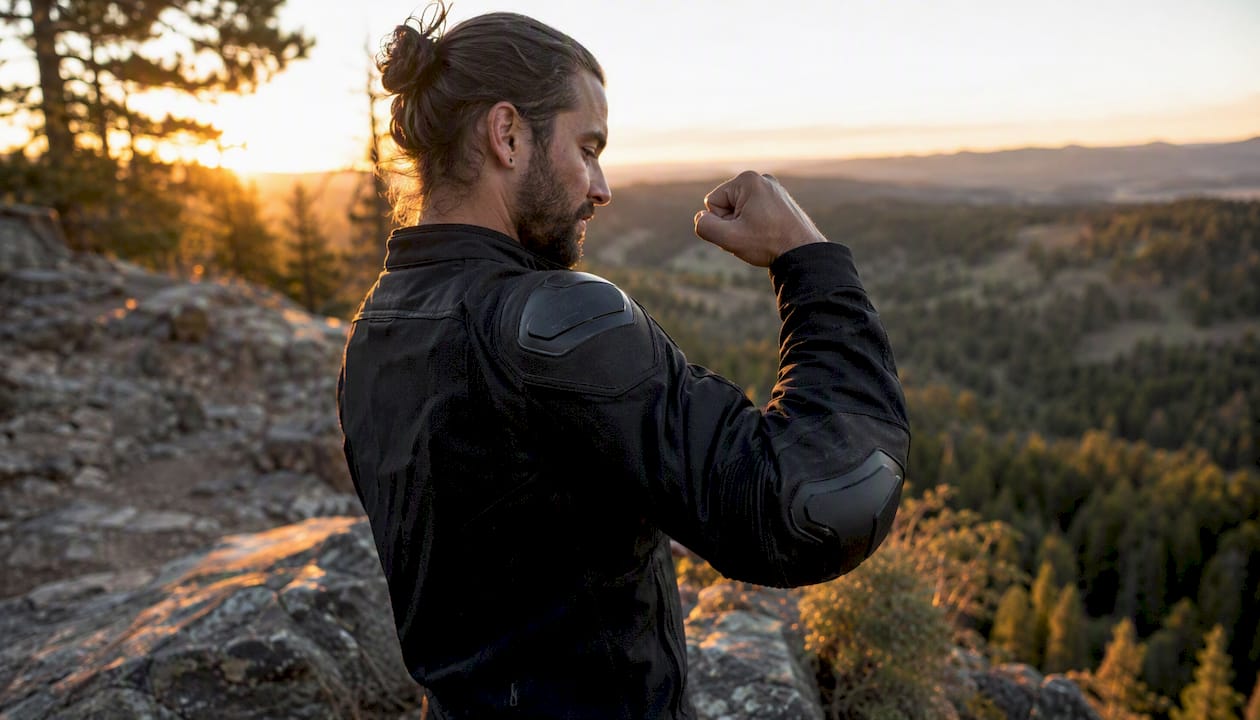
Start with your chest measurement at the fullest point under your arms. Then measure torso length from the base of your neck to your natural waist. Both numbers matter because touring jackets typically use about a 2-inch chest-to-waist drop, while sport cuts can use up to an 8-inch drop. If your body proportions don’t match the jacket’s cut, the chest can fit while the waist pulls tight — or vice versa.
Armor placement rules
- Shoulder: The shoulder cap should cover your AC joint (the bony point where your collarbone meets your shoulder blade). If it sits inward toward your neck, the jacket is too large.
- Elbow: With your arm bent as if on the bars, the elbow armor should sit directly over the elbow joint. If it migrates toward your forearm, the jacket is too long in the sleeve.
- Back protector: Should align with your spine and sit flat under the jacket without lifting when you lean forward. A back protector that rides up when you reach for the bars is a fit failure, not a comfort issue.
Pro Tip: Sit in a chair and push your arms forward as if gripping handlebars. If the jacket rises more than 1–2 inches at the waist or the elbow armor shifts off the joint, the size or cut is wrong. This is the same check technicians use in-store to validate protective coverage.
Layering for Canadian winters: Always measure wearing the base and mid layers you plan to ride in. A jacket that fits over a t-shirt in July will bind over a thermal mid-layer in November. If you ride year-round in Canada, consider sizing up one step and using the jacket’s waist cinch to take in the excess on warmer days.
- Measure sleeve length in riding posture, not standing straight
- Check that the jacket’s collar doesn’t gap when you tuck your chin
- Confirm the front zipper closes without strain at the chest
- Test that you can reach the bars without the jacket pulling at the armpits
How do you size motorcycle gloves correctly?
Gloves are the most under-measured piece of gear most riders buy. The palm circumference number is what drives sizing — not your shoe size, not your ring size.
- Wrap a soft tape around the widest part of your palm, just below the knuckles, with your thumb held out to the side.
- Note the measurement in inches or centimeters. Most brands publish a numeric chart (e.g., 8 in = size M for many brands, though this varies).
- Try the gloves on and check fingertip fit: no excess material bunched at the tips, and your fingers should flex at the knuckles without the glove pulling tight.
- Test grip: close your hand around a bar or similar object. The glove should feel secure, not loose enough to rotate.
Gauntlet vs. short cuff: Gauntlet gloves extend over the jacket sleeve, so you may need to size slightly differently depending on how thick your jacket cuff is. The gauntlet should overlap the jacket sleeve by at least 2 inches to prevent a gap in a crash. Short cuff gloves tuck inside the sleeve — fit them purely to palm circumference.
Between sizes: Size up if you plan to wear liner gloves for Canadian winters or if the gloves are leather (leather softens and conforms over time). Size down if you need precise throttle and brake feel and the gloves are textile, which doesn’t stretch much. Touchscreen compatibility is worth checking — some gloves lose that function after the fingertip material wears.
How to size motorcycle pants and one-piece suits
Pants sizing trips up riders who assume motorcycle sizing tracks casual clothing. It doesn’t. The waist measurement is taken at your natural waist (near your belly button), not at the low-rise position most jeans sit.
- Measure waist at the narrowest point and hips at the widest pelvic point. Both numbers matter because riding pants often have a higher rise than street clothing, and the hip measurement determines whether you can actually pull them on.
- Inseam runs from your crotch to your ankle bone. Take this standing with feet shoulder-width apart.
- Check the rise (low, regular, or high) in the brand’s fit notes. A low-rise pant on a rider with a long torso can leave the lower back exposed when leaning forward.
The chest-to-waist drop issue from jackets reappears in one-piece suits. If your chest is a 44 and your waist is a 34, a sport suit cut for a 10-inch drop will fit your chest but gap at the waist. A touring suit with a smaller drop will fit the waist but may pull across the chest. Neither is wrong — they’re designed for different body types. When the numbers don’t align, prioritize chest fit and use the suit’s waist cinches to compensate.
Adjustability features worth checking: waist cinches, stretch panels at the hips and knees, and suspenders. A pant with good cinch adjustment can accommodate a half-size mismatch. A pant with no adjustability needs to fit right off the chart.
Boot sizing: length, width, and the sock thickness test
Motorcycle boots that fit correctly in sneakers often don’t fit correctly in riding boots. The construction is stiffer, the toe box is shaped differently, and the ankle protection adds bulk that changes how the foot sits.
- Measure foot length by standing on a piece of paper, tracing your foot, and measuring from heel to the tip of your longest toe. Do this in the afternoon or after some activity — feet expand slightly throughout the day, and buying boots on a morning measurement can mean they’re too tight by evening.
- Note your foot width. Narrow, standard, and wide fits exist across brands, though not all brands publish width options explicitly.
- Always try boots (or size them) wearing the socks you’ll actually ride in. A thin dress sock and a thick wool sock can shift your foot length by nearly a full size.
Pro Tip: Measure your feet in the afternoon or after a short walk. Feet swell slightly with activity, and boots that feel fine at 9 AM can pinch by noon on a long ride.
Fit checks:
- Standing: heel should lock with minimal lift when you rise on your toes. Excessive heel lift means the boot is too long or too wide.
- Sitting / bending: toes should touch the toe box lightly without cramping. Flex the boot at the ball of your foot to confirm the shifter-friendly flex point isn’t too stiff.
- Width: the widest part of your foot should sit comfortably without pressing against the boot’s sides.
If you plan to use orthotics or thicker insoles, size up half a size. Most motorcycle boot liners don’t compress as dramatically as helmet liners, but leather uppers do soften and conform over 20–40 hours of use.
Brand sizing charts and conversions for Canadian riders
No two brands share a single sizing standard. Manufacturer size charts and conversion tables are useful starting points but not standardized across brands, and the difference between a Shoei M and an HJC M can be several millimeters of circumference.
Canada conversion cheat sheet
Helmet circumference reference. Apparel conversions vary by brand and gender line.
Brand fit notes by gear category
| Gear Type | Typical Fit Tendency | Conversion Note | Between-Size Advice |
|---|---|---|---|
| Helmet (Shoei, Arai) | Intermediate to long oval; can run snug at temples for round heads | cm → US alpha per brand chart | Size down; padding compresses 15–20% |
| Helmet (Bell, HJC, Scorpion, Icon) | Rounder oval fit; HJC tends to run slightly larger | cm → US alpha; check brand chart | Size down unless pressure points appear |
| Jacket (Alpinestars, Dainese) | European sizing; tends to run slim; size up one if between | EU numeric → US alpha via brand chart | Size to chest; check torso drop |
| Jacket (REV’IT!, Klim) | REV’IT! runs true to European sizing; Klim fits slightly generous | EU → US; Klim uses US sizing | Size to chest; use cinch for waist |
| Jacket (Joe Rocket, Icon) | North American sizing; Joe Rocket runs true; Icon can run slim | US alpha sizing | Size to chest; check sleeve in riding posture |
| Gloves (all brands) | Numeric sizing or alpha; measure palm circumference | cm → numeric per brand chart | Size up for liners; down for precision feel |
| Pants (all brands) | Waist in inches or EU numeric; inseam varies widely | US waist/inseam → EU numeric | Size to waist; tailor inseam |
| Boots (all brands) | EU numeric standard; some brands offer US equivalent | EU → US: subtract ~32–33 | Size to foot length with riding socks |
Brand conversion variation is especially pronounced between women’s and men’s lines — a women’s EU 38 jacket and a men’s EU 38 jacket are not the same garment. Always cross-check the brand’s gender-specific chart rather than assuming the same conversion applies.
What should you do when you fall between sizes?
Short rules, by item:
- Helmets: Size down. Padding compresses and a snug helmet becomes comfortable. A loose helmet never becomes safe. Exception: if the smaller size creates a hot spot or pressure point that doesn’t ease after 20 minutes, check whether aftermarket cheek pads in a thinner thickness can solve it before moving to the larger shell.
- Jackets: Size to chest and torso fit. If the chest fits but the waist is loose, use the cinch. If the chest fits but the sleeve is short in riding posture, that’s a cut problem — try a different model, not a larger size.
- Gloves: Size up if you wear liners or if the gloves are textile. Size down if they’re leather and you need precise feel — leather will soften and conform.
- Pants: Size to waist. Inseam can be tailored; waist cannot. If the waist fits and the hips are tight, you need a different cut, not a larger size.
- Boots: Size to foot length with riding socks. Width issues need a different model, not a larger size.
Priority measurement per item:
- Helmet: head circumference
- Jacket: chest + torso drop
- Gloves: palm circumference
- Pants: waist + inseam
- Boots: foot length + width
Aftermarket solutions can close a gap: helmet cheek-pad sets, jacket waist cinches, boot insoles. But when the shell or chassis of the gear is wrong for your body shape, no accessory fixes it — a different model is the answer.
How to try gear at home and handle returns in Canada
Online gear purchases carry real sizing risk, but a structured home try-on reduces it significantly.
- Take all your measurements before the package arrives. Don’t try gear cold — compare your numbers to the brand chart first and confirm you ordered the right size.
- Try everything on wearing the layers you’ll actually ride in: base layer, mid-layer if applicable, and riding socks for boots.
- Run the fit tests: helmet movement check, jacket ride-up test in a seated forward-lean position, glove fingertip and grip check, boot heel-lock test.
- Document with photos and short video clips. Capture: helmet cheek contact from the front, jacket sleeve length while reaching forward, zipper closure at the chest, and boot heel lift while rising on your toes. This documentation protects you if you need to initiate a return or exchange.
- Check the seller’s return window, restocking fees, and return shipping policy before you wear anything outside or remove tags. Canadian online retailers vary widely — some offer free returns; others charge restocking fees of 10–15%.
Pro Tip: Keep all original packaging, tags, and hygiene liners intact until you’re certain the gear fits. Helmets and gloves with removed hygiene seals are typically non-returnable. Never ride in gear you might return — even a short driveway test can void the return policy.
For riders near Squamish, BC, Dirtybirdypowersports offers in-person fitting that eliminates most of this risk. For riders elsewhere in Canada, nationwide delivery with a clear exchange process is available — contact the team before ordering if you’re unsure between sizes.
Expert tips for Canadian riders on fit, seasons, and maintenance
Retailer technicians who fit gear regularly develop a short list of checks that most online guides skip.
- Armor alignment in riding position: Always sit on a bike or a chair in riding posture before finalizing a jacket purchase. Shoulder armor that sits correctly standing up can rotate inward when you reach for the bars. CE Level 2 back protectors should sit flush against your spine without a gap when you lean forward.
- Winter liner sizing: If you ride through Canadian winters, size your jacket to accommodate a removable thermal liner. Most liners add roughly 5–10mm of bulk at the chest and arms. A jacket that fits perfectly over a t-shirt in summer may not close over a liner in January. Waist cinches and sleeve tabs can compensate for a half-size difference, but not a full size.
- Seasonal face gear: Balaclavas and neoprene dust masks add thickness under a helmet. If you plan to wear one regularly, try the helmet with it on — some riders need to size up or choose a model with a removable chin curtain.
- Heated layer sizing: Heated base layers are thinner than traditional mid-layers but still add some bulk. Measure with them on if you plan to use them under your jacket.
Maintenance notes that affect fit over time:
Leather jackets stretch. A leather jacket that fits snugly at purchase will typically loosen at the chest and arms after 30–50 hours of use. This is normal and desirable — it’s why leather riders often size down slightly on new gear. Textile jackets don’t stretch the same way, but waterproof membranes can delaminate if washed incorrectly, which affects how the jacket drapes and how armor sits.
Helmet cheek pads compress over time. If your helmet starts to feel loose after a year of regular use, replacement cheek pads in the original thickness (or slightly thicker) restore the fit. Shoei, Arai, Bell, and HJC all sell replacement pad sets for current models.
Dirtybirdypowersports’s team rides the machines and gear they sell — that’s not a marketing line, it’s the reason their fitting advice is grounded in actual use rather than spec sheets. With over 200 successful deliveries across Canada and a 5.0 Google rating, the dealership has built a track record that matters when you’re buying gear you can’t try on in person.
How gear care and maintenance affect fit over time
Gear doesn’t stay the same size forever. How you clean and store it determines whether it fits the same way in year three as it did on day one.
Leather: Clean with a dedicated leather cleaner and condition regularly. Leather that dries out stiffens and can shrink slightly, particularly at seams. Over-conditioning softens it too much and accelerates stretch. The target is supple but not floppy. Store leather jackets on a wide hanger, not folded, to prevent permanent creasing that distorts the cut.
Textile and laminate: Follow the manufacturer’s wash instructions precisely. Most textile jackets with waterproof membranes (Gore-Tex, Sympatex, or proprietary laminates) require low-heat tumble drying or re-treatment with a DWR (durable water repellent) spray after washing. Washing at too high a temperature can cause the membrane to delaminate, which changes how the jacket sits and can shift armor pockets out of position.
Helmets: Never use solvent-based cleaners on the interior liner — they degrade the EPS foam and can compromise the helmet’s structural integrity. Wash cheek pads and liners by hand in mild soap and let them air dry completely before reinstalling. A wet liner compresses differently and can make the helmet feel temporarily loose.
Gloves: Leather gloves cleaned with the wrong product can stiffen or shrink. Use a leather-specific cleaner and conditioner. Textile gloves can usually be hand-washed, but check the manufacturer’s tag — some waterproof gloves lose their membrane effectiveness if machine washed.
Boots: Leather motorcycle boots benefit from regular conditioning and waterproofing treatment. Neglected leather stiffens at the ankle, which reduces the boot’s protective flex and can make the fit feel tighter than it actually is. Textile boots should be re-treated with a waterproofing spray seasonally, especially for Canadian wet-weather riding.
A straight take on gear fit from Dirty Birdy Powersports
Most riders spend more time picking a helmet graphic than checking whether the helmet actually fits their head shape. That’s backwards. A helmet that looks great but rocks on your skull is a liability, not protection.
The hierarchy matters: helmet fit first, always. A loose helmet in a crash can rotate and expose your face, or worse, come off entirely. After that, jacket and suit coverage — specifically whether the armor stays on your joints in a real riding position, not just standing in a store. Gloves and boots matter too, but a glove that’s slightly loose costs you control feel; a helmet that’s slightly loose costs you protection.
For Canadian riders deciding between budget and premium gear: if you commute daily or ride in mixed weather, invest in a quality jacket with CE Level 2 back protection and a waterproof outer layer. Budget gear often skips the back protector or includes a Level 1 foam pad that meets the minimum standard but not much more. For weekend adventure riding or touring, the same logic applies — the gear you wear the most deserves the most scrutiny on fit and protection rating.
The lowest-risk way to buy online in Canada is to measure precisely, match to the brand chart, order from a seller with a clear return policy, and document your try-on. If you’re near Squamish or willing to use nationwide shipping, an in-person or phone consultation before you order beats any sizing chart.
Dirtybirdypowersports fits you right, ships anywhere in Canada
Sizing charts get you close. A knowledgeable fitter gets you there. At Dirtybirdypowersports, the staff rides the gear they recommend — which means when you call or visit with your measurements, you’re talking to someone who has actually worn the product in Canadian conditions, not someone reading from a spec sheet.
The dealership carries OEM and aftermarket apparel and accessories, ships nationwide with no markup, and has completed over 200 deliveries across Canada with a 5.0 Google rating. If you’re between sizes, unsure about a brand’s fit tendency, or want to confirm armor placement before committing to a purchase, the team can walk you through it. For riders in BC, in-person fitting appointments are available at the Squamish location. For everyone else, nationwide delivery with exchange support means you’re not stuck with gear that doesn’t fit. Browse the full catalog or reach out directly at Dirtybirdypowersports to get sized before you buy.
Sources
- Motorcycle Gear — FAQ: How to measure yourself for motorcycle jackets & pants
- Motorcycle Clothing Size Charts — webBikeWorld
- Motorcycle Helmet Size Charts — The Helmet Shop
- Motorcycle Helmet Size Calculator + Head Shape Guide — ItsBetterOnTheRoad
- The sizing center — Riding Gear Warehouse
Always prefer the manufacturer’s own sizing chart for the specific model you’re buying. Generic conversion tables are useful for narrowing options; the brand chart is what you size from.
Recommended
- Polaris Ranger Boxed Front Forward Control Arms – Dirty Birdy Powersports
- TF281201.F-I | CFMOTO UForce U10 PRO Front Forward Control Arms (Pre-I – Dirty Birdy Powersports
- TF281201.F | CFMOTO UForce U10 PRO Front Forward Control Arms (Non-Ins – Dirty Birdy Powersports
- M0 6.5” Element Ready™ Moto-Can Speakers – Dirty Birdy Powersports