

The only authoritative source for your CFMOTO torque specs is the official Service Manual for your exact model and production year. Not a forum post. Not a generic bolt chart. The manual. CFMOTO publishes model- and year-specific manuals through their owner portal, and those documents contain dedicated Fastener Torque Tables organized by bolt diameter and component. Before you touch a wrench, three things matter:
- Confirm your model, year, and VIN before pulling any torque value
- Inspect threads and verify fastener grade — a correct torque on a damaged or wrong-grade bolt is still a failure waiting to happen
- Use a calibrated torque wrench; a click-type wrench that hasn’t been zeroed and stored properly can read 15–20% off, which is enough to strip a thread or leave a wheel nut dangerously loose
If you’re unsure about any of those three, contact an authorized CFMOTO dealer before proceeding.
Key takeaways
The official CFMOTO Service Manual for your exact model and year is the only authoritative source for torque specifications; generic charts and cross-model assumptions are the leading cause of torque-related failures.
| Point | Details |
|---|---|
| Manual first, always | The CFMOTO Service Manual for your VIN is the only authoritative torque source. |
| Component section overrides general table | When the component chapter conflicts with the diameter chart, the component chapter wins. |
| Lubrication changes the math | Apply oil or threadlocker exactly as specified; dry vs. lubricated torque values are not interchangeable. |
| Re-torque after first ride | Settle-in on new assemblies can reduce clamp force; re-check at 50–100 km. |
| Dirtybirdypowersports for OEM support | Contact Dirtybirdypowersports for VIN-based manual lookups, OEM fasteners, and professional torque checks. |
Table of Contents
- CFMOTO torque specs: common bolt diameter quick reference
- Example torque values from common CFMOTO manuals
- How to find the right torque table in your service manual
- Safe torquing technique: step by step
- Common mistakes that cause torque-related failures
- How an authorized CFMOTO dealer supports safe torquing
- Get the right parts and specs from Dirtybirdypowersports
- Sources
CFMOTO torque specs: common bolt diameter quick reference
The table below gives typical torque ranges for standard metric fasteners. These are general starting points for non-critical fasteners only. Always confirm with your Service Manual before torquing any drivetrain, suspension, or brake component.
| Thread Diameter | Typical Torque (N·m) | Typical Torque (ft·lb) |
|---|---|---|
| M5 | 4–6 N·m | 3–4 ft·lb |
| M6 | 8–10 N·m | 6–9 ft·lb |
| M8 | 18–25 N·m | 12–18 ft·lb |
| M10 | 40–50 N·m | 25–35 ft·lb |
| — | a typical torque range usually between about 50 N·m and higher for large bolts | a suitable torque range for large bolts |
| — | a common torque range around 100 N·m for heavy bolts | a typical range for heavy bolts |
| M20 | a high torque range generally starting at about 200 N·m for very large bolts | a torque range suitable for very large bolts |
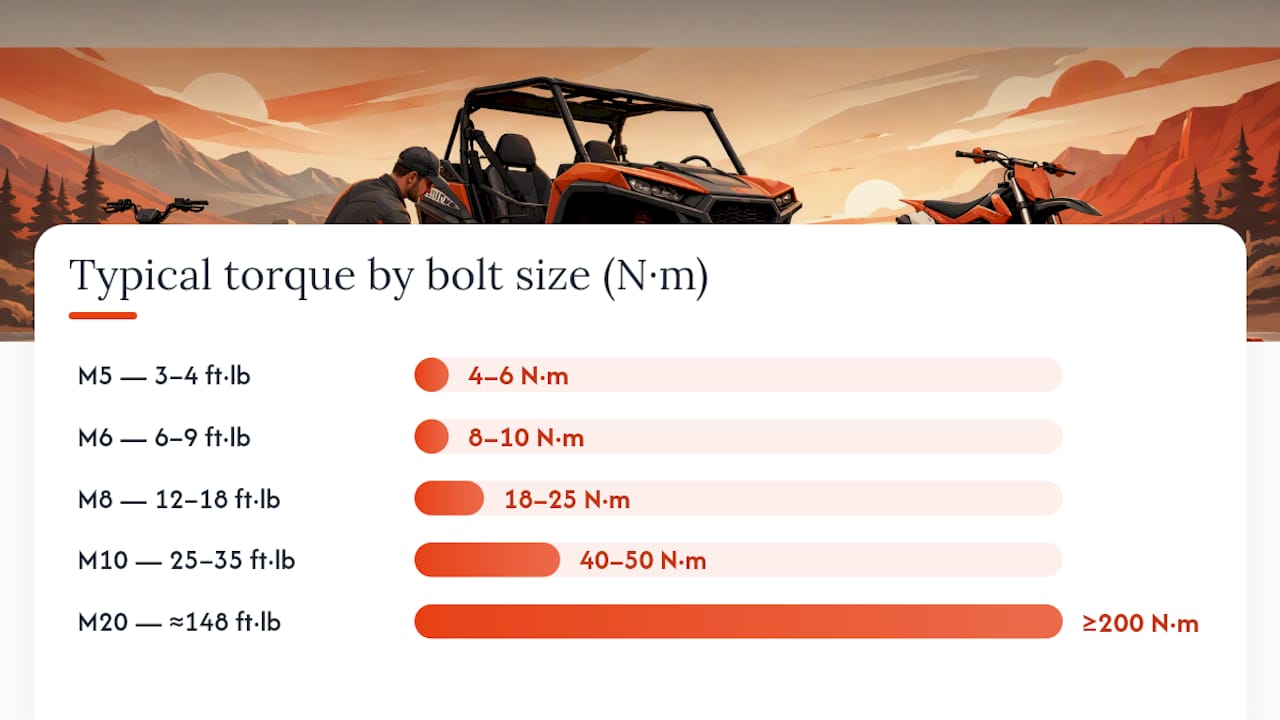
Unit conversion: 1 N·m = 0.738 ft·lb. The CFMOTO CFORCE 400/500 Service Manual uses the conversion factor 1 N·m = 0.73756 ft·lb in its fastener tables.
When this chart is appropriate:
- Quick sanity-checks on body panels, skid plate bolts, or accessory mounts
- Situations where the manual is temporarily unavailable and the fastener is non-critical
When to stop and consult the manual instead:
- Wheel lug nuts, axle nuts, caliper bolts, engine mounts, A-arm pivot bolts, CVT cover bolts, or any fastener on a safety-critical system
- Any bolt the manual flags with a specific torque, threadlocker, or multi-step sequence
Example torque values from common CFMOTO manuals
These are illustrative values drawn from published CFMOTO service documentation. Treat them as reference points, not substitutes for your own manual.
CF800 / ZFORCE 800
The CF800 Service Manual lists wheel mount nuts at 70–80 N·m (52–59 ft·lb) and many M10 fasteners in the 40–50 N·m range. Spark plug torque on some CF800 variants is listed at 20 N·m (15 ft·lb). The manual explicitly notes that threads and contact areas must be coated with oil before assembly.
CFORCE 1000
The CFORCE 1000 owner manual specifies spark plug torque at 20 N·m and includes a standard tightening torque chart mapping bolt diameters to N·m values. Verify every component-specific entry in the full Service Manual, not just the owner manual.
ZFORCE 950 Sport
The 2022 ZFORCE 950 Sport brochure lists peak engine output torque at 87 N·m at 5,500 rpm. That figure describes engine performance, not fastener torque. Fastener values for this model live in the Service Manual.
300NK
The 300NK Service Manual follows the same structure: a general fastener chart by diameter, plus component-specific entries for engine, chassis, and brake hardware. M8 bolts on this platform typically fall in the 18–25 N·m range, but caliper and axle values differ. Verify in the 300NK-specific manual.
UForce 800
UForce 800 chassis fasteners, including A-arm pivot bolts and shock mounting hardware, carry model-specific torque values that can differ from the general chart. When installing UForce control arms, always pull the component-specific torque entry from the manual, not the diameter-based table.
How to find the right torque table in your service manual
- Locate your VIN. On most CFMOTO ATVs and UTVs, the VIN is stamped on the frame near the front left wheel. On motorcycles like the 300NK, check the steering head. The VIN encodes the model year and production variant.
- Download the correct manual. Go to the CFMOTO owner portal, enter your model and year, and download the Service Manual (not just the owner manual). If it isn’t available there, contact an authorized dealer with your VIN.
- Find the Fastener Torque Table. Most CFMOTO Service Manuals have a dedicated section titled “Fastener Torque Table” or “Tightening Torque” near the front of the manual or within the general specifications chapter. This table maps bolt diameter to a general torque range.
- Cross-reference with the component chapter. Each major system (engine, brakes, suspension, drivetrain) has its own chapter with component-specific torque entries. When a component chapter lists a torque that differs from the general table, the component chapter wins. This is documented across multiple CFMOTO manual formats.
- Check for special instructions. Look for notes on multi-step torquing sequences, left-hand threads (common on some CVT and brake components), threadlocker requirements, and oil-coating instructions.
What the table columns mean: Thread diameter (M8, M10, etc.), part name or location, torque value in N·m, and sometimes a secondary ft·lb column. Some tables add a “remarks” column for lubrication or threadlocker callouts.
If the manual for your model isn’t available online, an authorized dealer can pull it by VIN and supply OEM fasteners at the same time.
Safe torquing technique: step by step
- Inspect the fastener and threads. Run the bolt in by hand. If it binds, cross-threads, or feels rough, stop. A bolt that doesn’t thread cleanly will give a false torque reading and can fail under load.
- Clean the threads. Remove old threadlocker, rust, or debris with a thread chaser or wire brush. Contaminated threads absorb torque as friction rather than clamping force.
- Verify fastener grade. CFMOTO fasteners are grade-specified. Replacing a tensile-grade bolt with a hardware-store equivalent risks structural failure on safety-critical joints. Source OEM replacements through authorized channels.
- Apply lubrication or threadlocker as specified. The CF150-A Service Manual states that threads and contact areas should be coated with oil so the applied torque converts into the correct clamping force. Where the manual calls for threadlocker instead, use the specified grade (blue or red) — not both.
- Hand-start every fastener. Never use an impact driver to run a bolt down before torquing. Hand-starting confirms thread engagement and prevents cross-threading.
- Torque in a progressive cross-pattern. For multi-bolt assemblies (wheel hubs, cylinder heads, brake caliper brackets), reach final torque in two or three passes in a star or cross pattern. This distributes clamp load evenly and prevents warping.
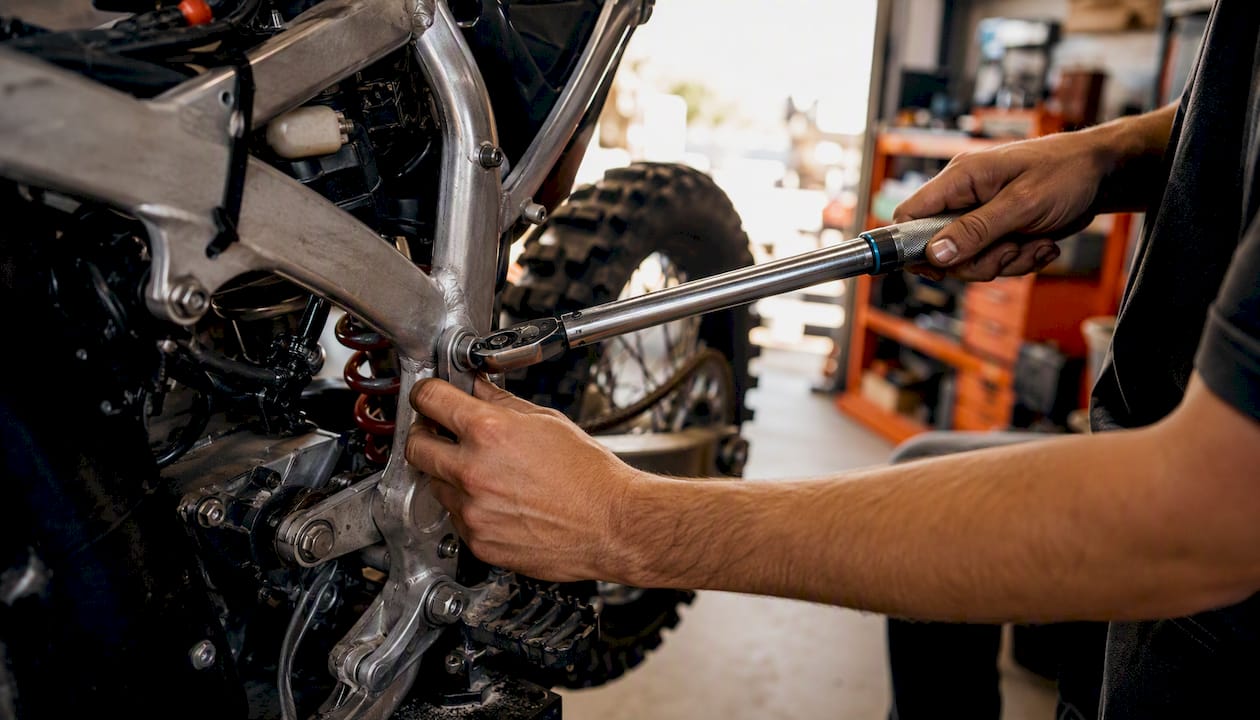
- Verify with a final pass. After reaching the specified value, do one slow final pass to confirm the wrench clicks at the correct setting without the fastener moving further.
Pro Tip: Store your click-type torque wrench at its lowest setting, not at zero. Leaving it at a high setting compresses the spring permanently and throws off calibration. Have it checked against a known standard once a year if you use it regularly.
After the first 50–100 km on any freshly assembled drivetrain or suspension component, re-torque the fasteners. Settling and initial load cycles can reduce clamp force by a measurable amount, particularly on aluminum-to-steel joints.
Common mistakes that cause torque-related failures
Using the wrong bolt grade. A Grade 8.8 bolt and a Grade 10.9 bolt look identical. The torque spec in the manual assumes the correct grade. Swap in a lower-grade bolt and the fastener yields before reaching the intended clamp force.
Dry vs. lubricated thread confusion. Torque specs in CFMOTO manuals are written for the lubrication condition stated in that manual. Applying a “lubricated” torque value to dry threads over-clamps the joint. Applying a “dry” value to oiled threads under-clamps it. Read the remark column.
Cross-model assumptions. The ZFORCE 800 and ZFORCE 950 share a body family but not all fastener specs. Visually similar engines across model years can use different bolt diameters, thread pitches, or grades. Never carry a torque value from one model to another without verifying it in the second model’s manual.
Relying on generic online charts. A chart that maps M10 to “40–50 N·m” is a starting point, not a specification. Brake caliper bolts, axle nuts, and CVT cover bolts on CFMOTO machines often fall outside generic ranges. Using OEM-sourced fasteners and manual-verified specs is the only safe approach.
Red-flag symptoms to stop and inspect:
- Wheel nuts that feel loose after the first ride following a tire change
- Oil seeping at engine mount or cover bolt locations
- Brake pedal feel that changes after caliper service
- Vibration or clunking from suspension that wasn’t present before a service
When any of these appear, stop riding and inspect before the next outing. Stripped threads or a pulled stud are far cheaper to fix early than after a failure on the trail.
For aftermarket suspension hardware, heavy-duty replacement hardware kits should still be torqued to the values in your CFMOTO Service Manual unless the aftermarket manufacturer explicitly provides different specs with engineering documentation.
How an authorized CFMOTO dealer supports safe torquing
Dealer-level support goes beyond selling parts. An authorized CFMOTO dealer can:
- Pull the exact Service Manual for your VIN and model year, including manuals not yet posted to the public portal
- Supply OEM fasteners with the correct grade, thread pitch, and coating — not hardware-store substitutes
- Perform professional torque checks on critical fasteners using calibrated shop equipment
- Advise on threadlocker grades, re-torque schedules, and model-specific quirks that don’t always make it into the owner manual
When to go to a dealer instead of DIYing:
- CVT pulley nuts, clutch hub nuts, or output shaft bolts (high torque, often left-hand thread, require specific holding tools)
- Any fastener where the thread is seized, stripped, or shows corrosion
- Suspension pivot bolts on a vehicle that has been in a collision or hard impact
- Any situation where you can’t confirm the bolt grade or the correct torque value
Pro Tip: When installing a lift kit or aftermarket control arms, ask your dealer to confirm the torque specs for the new geometry. Lift kits change suspension angles, and some fasteners may need re-torquing at a different value than stock.
Dirtybirdypowersports stocks OEM CFMOTO parts and accessories and can connect you with the correct manual for your machine. Their team rides the machines they sell, which means the advice you get is grounded in actual use, not a parts catalog.
What the manual always gets right that memory never does
Every time I see a torque-related failure on a CFMOTO, it traces back to one of two things: a missing manual or a confident assumption. The assumption is always the more dangerous one, because it feels like knowledge.
CVT-driven pulley nuts and wheel hub nuts are where model-specific variation matters most. The ZFORCE 800 and ZFORCE 950 look close enough that a tech who has worked on one might assume the other is the same. It isn’t. Thread pitch, bolt grade, and specified torque can all differ across a single model family, let alone across years. The clutch nut on some CFMOTO platforms uses a left-hand thread, and if you don’t know that going in, you’ll tighten it the wrong direction and wonder why it keeps loosening.
The habit that prevents all of this is simple: open the manual before you open the toolbox. Mark fasteners with a paint pen after torquing so you can see at a glance if anything has moved. Log the torque values and date in a small notebook kept with the machine. Three minutes of record-keeping has saved more than a few riders from a repeat teardown.
Get the right parts and specs from Dirtybirdypowersports
Sourcing the correct manual and OEM fasteners before you start a job is the single step most DIY mechanics skip. Dirtybirdypowersports carries OEM CFMOTO parts and can locate the exact Service Manual for your model and VIN. Whether you need a replacement bolt set for a suspension rebuild or a torque-check on critical drivetrain fasteners, the team at Dirtybirdypowersports has the tools and the model knowledge to get it right.
While you’re outfitting your machine after a service, the Braven Hellhound Uber XOR ATV/UTV Radials are worth a look — a tire that matches the performance of a properly maintained drivetrain. Contact Dirtybirdypowersports directly to confirm parts availability, request a manual lookup by VIN, or book a professional torque inspection.
Sources
Forums like CFMoto Forums and various ATV communities can help clarify which manual chapter to consult or flag known model-year quirks. They are useful for navigation, not for torque values. Always cross-check any forum-sourced number against the Service Manual before applying torque.
Recommended
- TF281201.F | CFMOTO UForce U10 PRO Front Forward Control Arms (Non-Ins – Dirty Birdy Powersports
- TF281201.F-I | CFMOTO UForce U10 PRO Front Forward Control Arms (Pre-I – Dirty Birdy Powersports
- TF281301 | CFMOTO UForce U10 PRO Lift Kit - 2 Inch – Dirty Birdy Powersports
- TF281201.R | CFMOTO UForce U10 PRO Rear Control Arms (Pre-Installed) – Dirty Birdy Powersports