

Yes, you can install a quality ATV mirror yourself in one afternoon with basic hand tools and a model-appropriate clamp or adapter. Most kits mount to the handlebar, ROPS/roll-cage, or windshield in under an hour per side. Follow the sequence below, torque things correctly, and you’ll ride away with a real gain in rear visibility.
TL;DR:
- Using rubber isolators and cleaning mounting surfaces significantly reduces vibration-induced mirror loosening during rough trail conditions.
- Correctly matching the clamp size to your tube diameter and starting with loose assembly prevents fitment issues and ensures stability.
- Proper mirror adjustment from the rider’s position, focusing on horizon placement, optimizes rear visibility and minimizes blind spots.
- Regular weekly or monthly checks of clamp tightness and mirror condition help prevent failures that could compromise safety.
- Model-specific brackets are recommended for tight or angled A-pillar spaces, saving time and ensuring a secure, vibration-free fit.
Table of Contents
- What Tools And Parts Do You Need For An ATV Mirror Install?
- How Do You Install ATV Mirrors Step By Step?
- Handlebar, ROPS, Or Windshield: Which Mount Fits Your Machine?
- How Do You Stop ATV Mirrors From Vibrating Loose?
- How Do You Set The Mirror Angle And Check Your Field Of View?
- How Often Should You Check Your ATV Mirrors For Problems?
- Notes From The Shop Floor At Dirty Birdy Powersports
- Why Most Mirror Complaints Are Really Mounting Mistakes
- Where To Get TEK Mirror Kits And Adapters
- Sources
What Tools And Parts Do You Need For An ATV Mirror Install?
Lay everything out before you touch a wrench. Rushing the parts check is where most ATV mirror installations go sideways.
- Hand tools: open/box end wrenches, a socket set, hex keys (most clamps use 4mm to 6mm), and a Phillips or flat screwdriver for trim panels.
- Fasteners: M6 or M8 bolts and nuts show up in most kits, according to Finntrail’s installation breakdown; keep a few extra washers and shims on hand for gap filling.
- Mirror kit contents: clamp halves, a mounting bracket, a ball joint head, anti-vibration isolators, and (on better kits) replaceable convex glass. ATV-UTV TEK kits include variants for handlebar and roll-cage mounting, plus universal adapters for odd tube sizes.
- Safety gear: gloves and eye protection, especially when you’re working near sharp bracket edges or torquing near your face.
- A helper, particularly for center-mount or larger UTV mirrors that need someone holding the housing steady while you set the bracket.
How Do You Install ATV Mirrors Step By Step?
Work through this in order. Skipping the cleaning step is the single most common reason a clamp slips loose two rides later.
- Confirm fit and unpack the kit. Match your tube diameter (handlebar, ROPS, or windshield frame) against the clamp size before you open a single bag. A mismatch here wastes the whole afternoon.
- Clean the mounting surface. Wipe down the tube or frame with a degreaser and a rag until it’s bare metal or clean plastic. Contamination, wrong clamp orientation, and missing shims are the three most common reasons a clamp slips under vibration, and cleaning solves the first one for free.
- Position and loosely assemble the clamp. Set it where you want the mirror, then snug the bolts by hand only. Check clearance around the A-pillar, any pod lights, or GPS mounts before going further.
- Attach the mirror housing to the bracket. Thread the ball joint on, and pre-set a rough viewing angle so you’re not fighting the housing during final torque.
- Tighten to spec. Bring the clamp bolts to their final torque, and use removable threadlocker on bolts exposed to constant vibration. Skip threadlocker on any bolt you expect to adjust seasonally.
- Verify before you ride. Grab the mirror housing and shake it firmly. Then have a second person sit in the seat while you check the sightline from outside. Finish with a short, slow ride over rough ground to confirm nothing walks loose.
Pro Tip: Keep the factory hardware bag until after your first real trail ride. If a bolt backs out or a shim shifts, you’ll want the exact spare on hand instead of hunting through a hardware store bin for the right thread pitch.
Handlebar, ROPS, Or Windshield: Which Mount Fits Your Machine?
The mount type matters more than the mirror itself. Pick wrong and you’ll fight blind spots or interference for the life of the machine.
- Handlebar mounts work well on ATVs with exposed bars. They’re quick to install and keep a low profile, but they sit closer to your hands and can vibrate more than a chassis-mounted option.
- ROPS/roll-cage clamps dominate UTV and side-by-side setups. Tube diameters vary by model, so check whether your kit needs a shim to fill the gap between clamp and cage.
- Windshield or visor adapters suit machines with a full windshield or an OEM-style visor mount, and they tend to sit higher for a cleaner rearward sightline.
- Model-specific brackets beat universal clamps whenever your A-pillar geometry is tight or angled, since a purpose-built Polaris-style bracket clears obstructions that a generic clamp catches on.
If you’re outfitting a Polaris Ranger, the TEK Polaris Ranger visor adapter is built for exactly that fitment problem.
How Do You Stop ATV Mirrors From Vibrating Loose?
Vibration is the enemy of every mirror mount, and it gets worse the rougher your trails get. A few habits fix most of it.
Use rubber isolators or Delrin spacers between the clamp and the tube, and make sure both mating surfaces are clean before you tighten anything. Housing material matters too: cast aluminum or high-impact polymer housings hold up better in cold, vibration-heavy conditions than the thin plastic found on budget mirrors. Torque the clamp to spec, then recheck it after your first ride, since new hardware tends to settle. If chatter persists after that, move the clamp to a stiffer section of the cage or swap the pivot hardware for fresh parts.
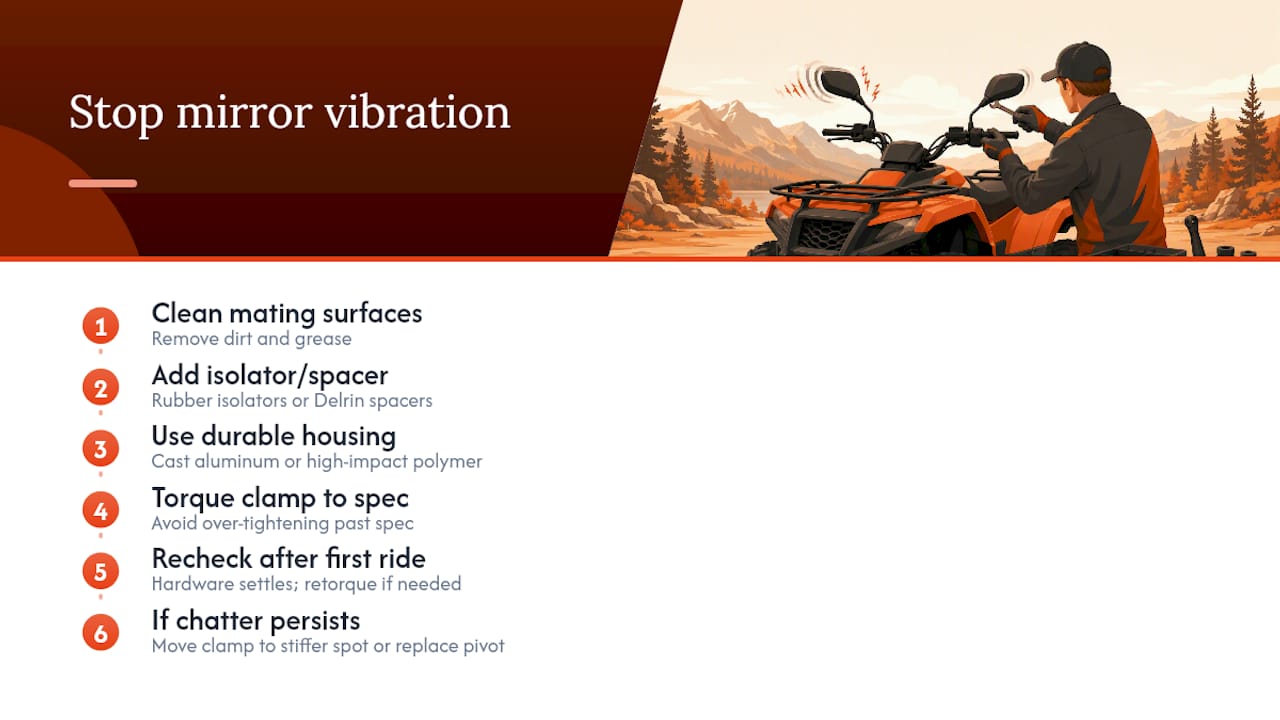
Pro Tip: If a mirror still buzzes after you’ve re-torqued it once, the clamp is probably in the wrong spot rather than under-tightened. Cranking bolts past spec cracks housings; relocating the clamp usually fixes the vibration for good.
How Do You Set The Mirror Angle And Check Your Field Of View?
A mirror that’s mounted perfectly but aimed wrong is still useless on the trail.
- Sit in your normal riding position and adjust the mirror so the horizon sits roughly in the upper third of the glass.
- Remember convex mirrors show a wider area but make objects look farther away than they actually are, so give yourself extra following distance until it becomes second nature.
- Run a two-person sightline test: have someone walk behind the machine while you call out when they enter and exit view.
- If you’re seeing mostly cage or fender, tilt the mirror head down slightly and out from the machine; if you’ve got a blind spot near the machine’s flank, that usually means the mount is too far inboard.
How Often Should You Check Your ATV Mirrors For Problems?
Treat mirror checks like you would tire pressure. Quick, routine, and easy to skip until something breaks.
- Weekly or monthly: check clamp tightness, pivot stiffness, and glass clarity, especially after rides through mud or heavy brush.
- Common fixes: re-torque the clamp, swap a worn isolator, replace a stripped bolt, or clean the clamp’s seating surface if it’s picked up grit.
- Replace the mirror when: the housing is cracked, the glass has shattered, the clamp keeps failing even after you’ve cleaned and re-shimmed it, or the glass has warped enough to distort your view.
Notes From The Shop Floor At Dirty Birdy Powersports
We’ve fitted enough machines to know where mirrors actually go wrong: mismatched clamp diameters, universal mounts fighting factory pod lights, and bolts torqued past what the housing can take. Our team can talk you through fitment before you order, or handle the install service if you’d rather leave it to us.
Why Most Mirror Complaints Are Really Mounting Mistakes
Most people who tell you their mirrors “don’t work off-road” never had a mirror problem to begin with. They had a mounting problem. A cheap mirror on a clean, correctly torqued, model-matched clamp will outperform an expensive mirror slapped onto a universal clamp fighting the wrong tube diameter.
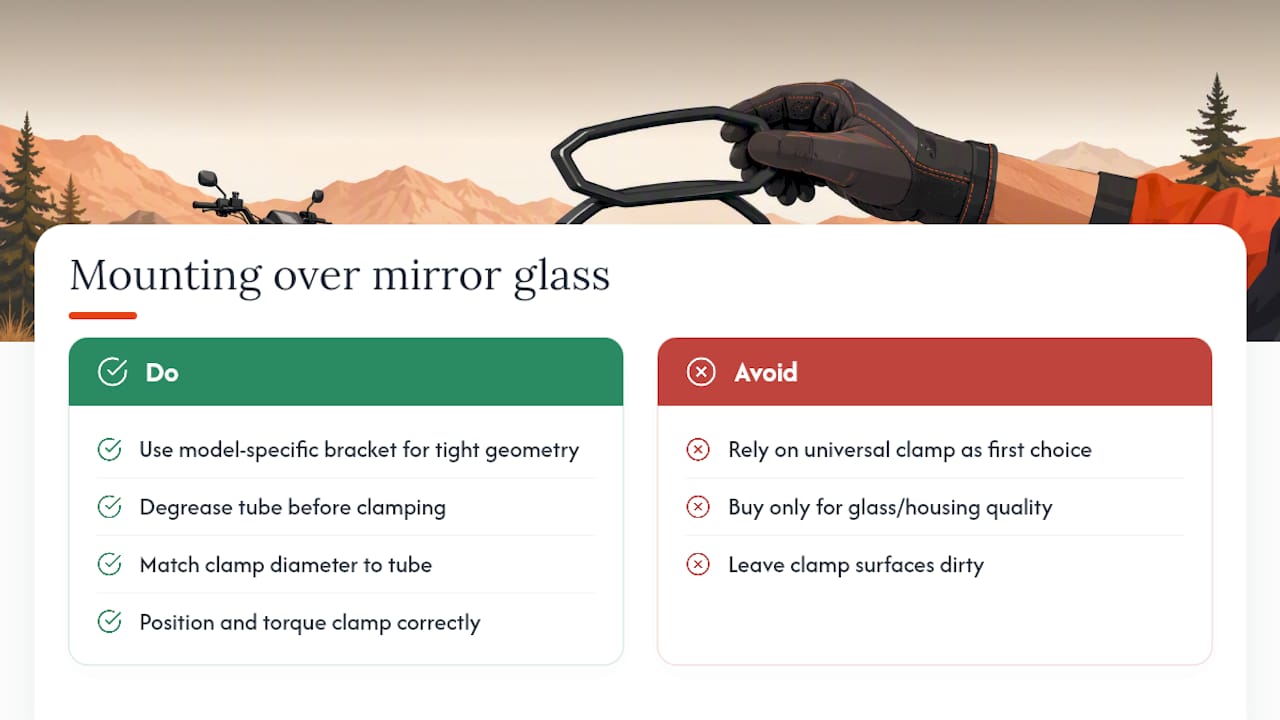
That’s the part conventional advice skips. Buying guides obsess over glass quality and housing material, and those things matter, but they matter less than getting the clamp position and prep right in the first place. A cracked housing is annoying. A clamp that walks loose on a rock trail because nobody degreased the tube first is a visibility problem at the worst possible moment.
The other thing worth saying plainly: universal clamps are a compromise, not a defect. They exist because no one wants to stock a thousand model-specific brackets. But if your machine has tight A-pillar geometry, a model-specific bracket or adapter will save you an afternoon of shimming and swearing. Spend the extra few dollars up front.
— Dirty
Where To Get TEK Mirror Kits And Adapters
Dirty Birdy Powersports keeps ATV-UTV TEK mirrors and adapters in stock for exactly the fitment situations covered above. The TEK Clearview UTV Center Mirror covers most roll-cage setups looking for a single wide-view option, while the TEK Clearview ATV Mirror 2-pack handles standard handlebar mounting.
If your machine has factory pod lights or tight A-pillar clearance, the TEK Polaris Ranger visor adapter solves the fitment headache before it starts. When you reach out for a quote or install booking, include your machine’s exact model and year and the mount location you want (handlebar, cage, or windshield), so we can confirm clamp diameter and clearance before anything ships. Browse the full mirror lineup or book a fitment check through the Dirty Birdy Powersports landing page, and if you’re outfitting the rest of the machine at the same time, this is also a good moment to look at tire options built for the same trail conditions.
Sources
For deeper fitment detail beyond this guide, check Seizmik’s mirror installation and product pages and SuperATV’s downloadable installation PDF for torque specs and bolt patterns.
- How To Install ATV Mirrors | Finntrail Blog
- Buyers guide: UTV aftermarket mirrors | Dirt Wheels Magazine
- How to install a Polaris ATV mirror | Adrenaline Powersports Mag